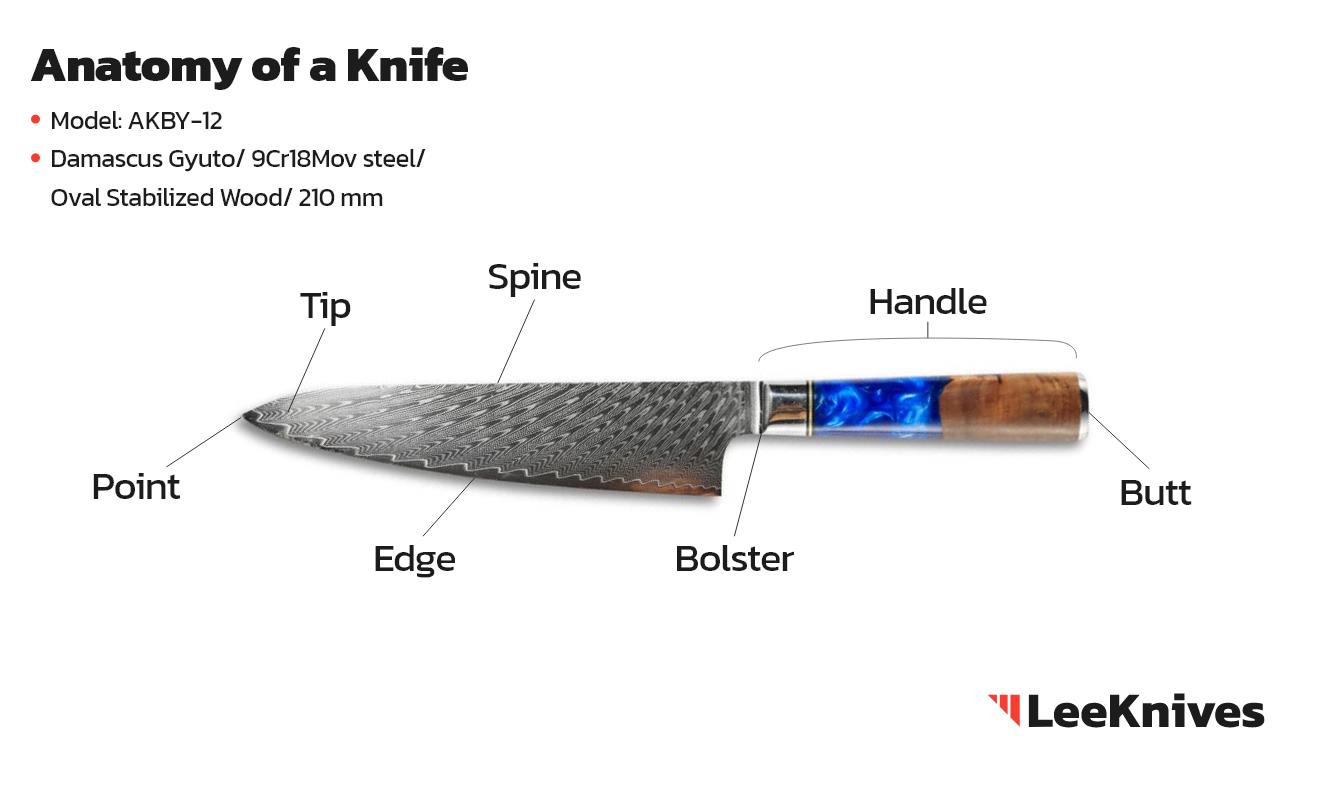
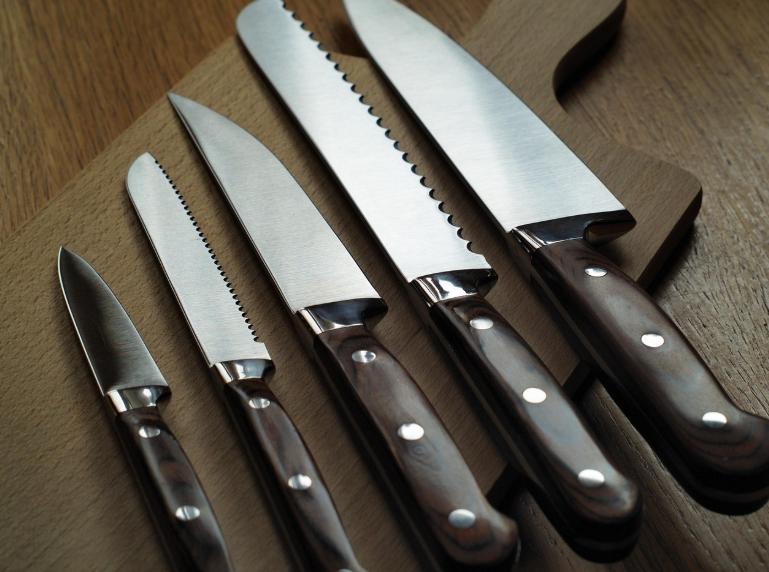
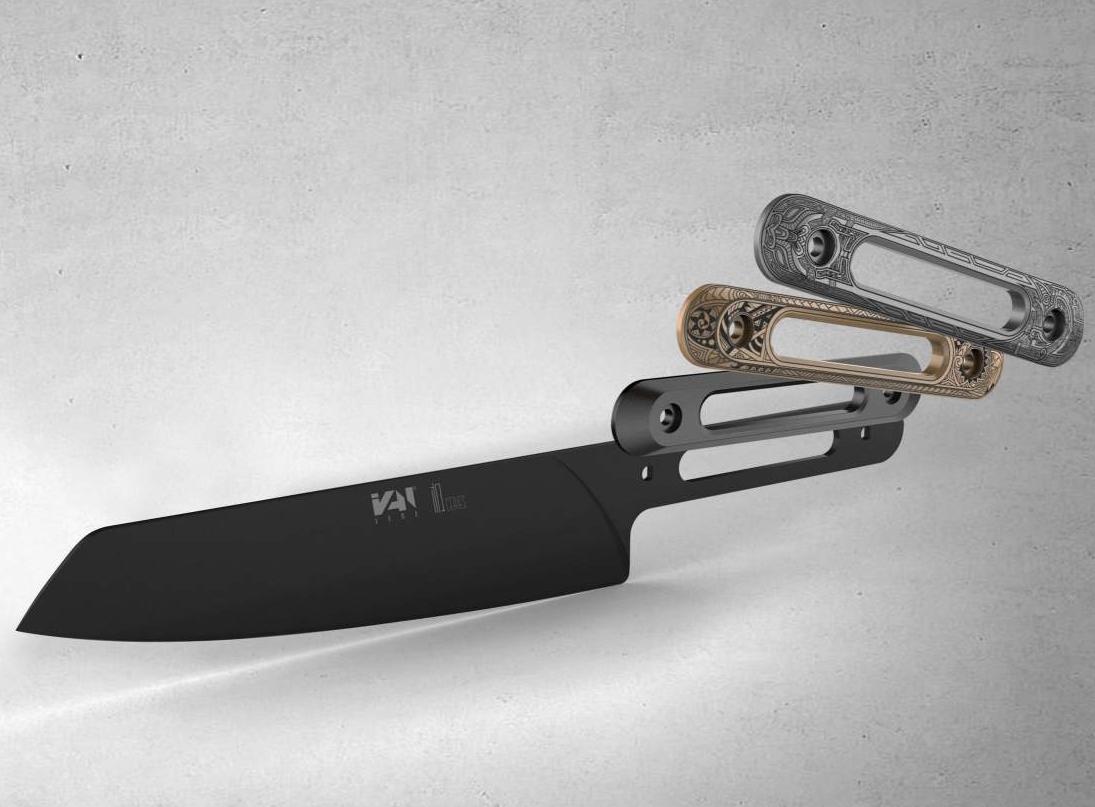
A knife is far more than handle and blade. Whether you’re picking your first chef’s knife, checking pocket knife builds for EDC, or ordering OEM knives wholesale, knowing knife parts lets you choose wisely and talk clearly with factories.
Every knife shares the same fundamental structure: a blade that does the cutting, a tang that provides structural integrity, and a handle that gives you control. Folding knives add a pivot and lock. Kitchen knives optimize for rocking and slicing. Survival knives prioritize brute strength.
In this complete guide, we’ll break down every part of a knife with a labeled diagram, explain how each component affects performance, and show you how anatomy differs across knife categories.
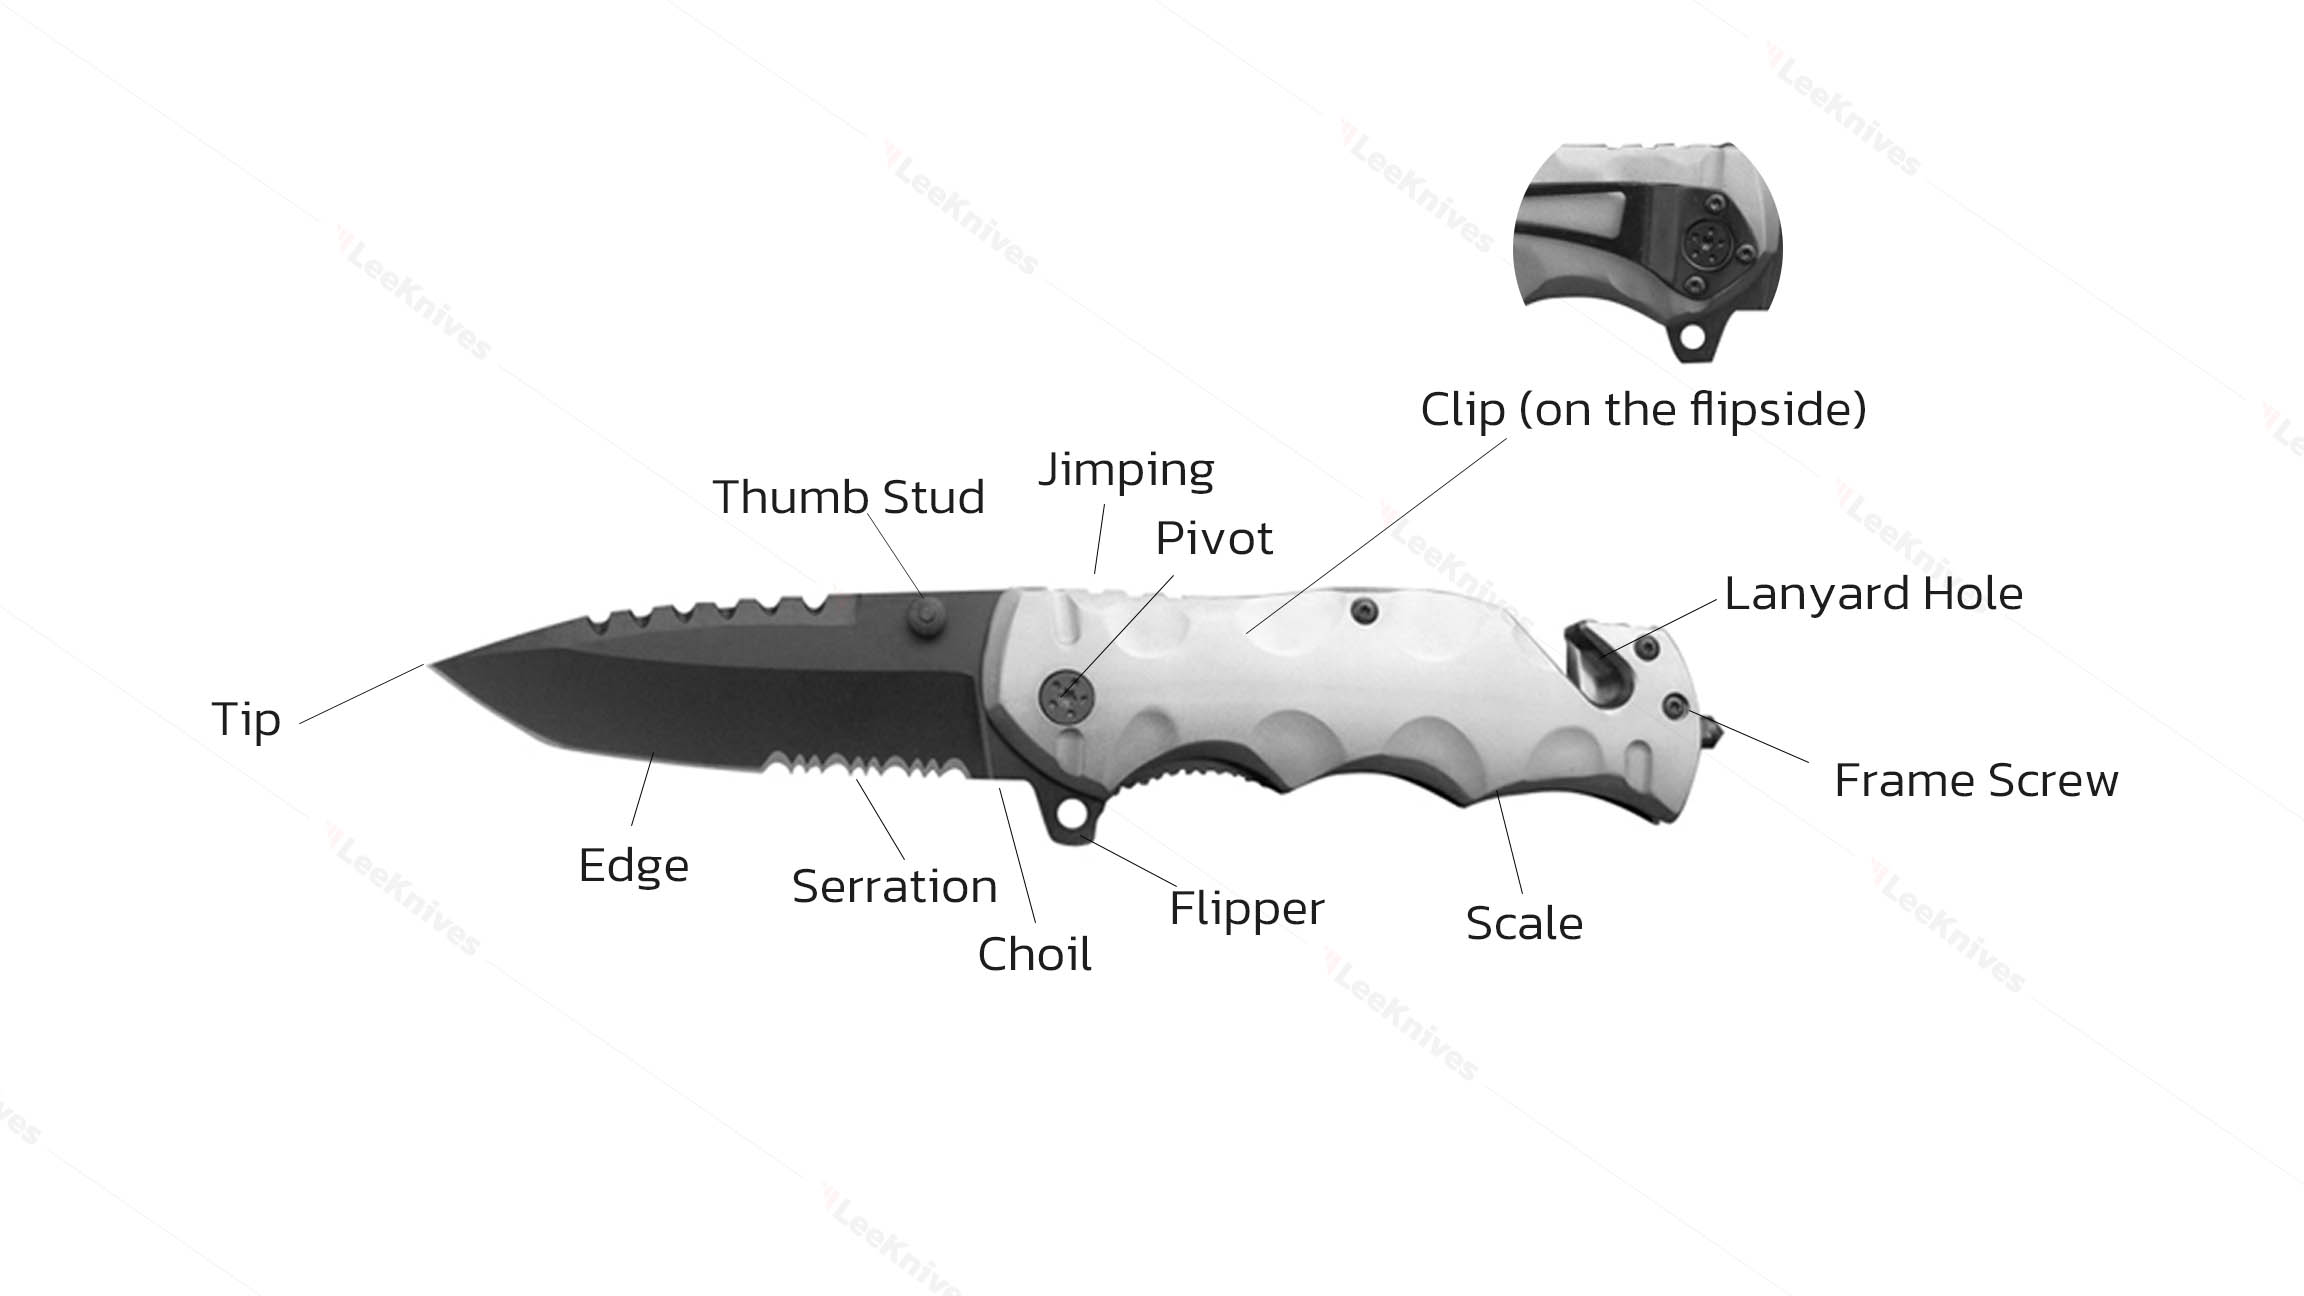
Parts of a Knife Diagram (Labeled)
| # | Part | Location | Function | Found On |
| 1 | Point | Where spine and edge meet at the front | Piercing, scoring, detailed work | All knives |
| 2 | Tip | The forward third of the edge | Precision slicing, delicate cuts | All knives |
| 3 | Spine | The unsharpened top edge of the blade | Structural strength, applying downward pressure | All knives |
| 4 | Edge | The sharpened cutting bevel | Cutting, slicing, chopping | All knives |
| 5 | Belly | The curved middle section of the edge | Rocking motion (especially German chef knives) | Primarily kitchen / fixed blades |
| 6 | Heel | The rear of the edge near the bolster/handle | Power chopping, joint separation, knuckle clearance | Primarily kitchen / fixed blades |
| 7 | Ricasso | The unsharpened flat section above the bolster | Blade thickness transition; finger rest | Mostly kitchen / fixed blades |
| 8 | Choil | The notch between the edge and the handle | Finger grip, sharpening stop | All knives |
| 9 | Plunge Line | Where the blade grind meets the ricasso | Grind termination point | Mostly fixed blades |
| 10 | Bolster | Thick metal junction between blade and handle | Balance, finger protection, hygiene barrier | Primarily kitchen knives |
| 11 | Tang | Blade extension inside the handle | Structural backbone, balance | Fixed blades only |
| 12 | Handle / Scales | The grip area | Control, comfort, leverage | All knives |
| 13 | Rivets | Through the scales and tang | Permanently secure handle to tang | Primarily kitchen / fixed blades |
| 14 | Butt / Pommel | The rear end of the handle | Counterbalance, striking surface | All knives |
| 15 | Pivot | Center of the handle | Blade rotation axis; enables opening and closing | Folding knives only |
| 16 | Lock | Inside the handle | Prevents blade from closing during use | Folding knives only |
| 17 | Thumb Stud / Hole / Flipper | On the blade or spine | One-hand opening assist | Folding knives only |
| 18 | Pocket Clip | Exterior of the handle | Secure carry, quick access | Folding knives only |
| 19 | Spacer / Standoff | Inside the handle (open position) | Maintains handle rigidity | Folding knives only |
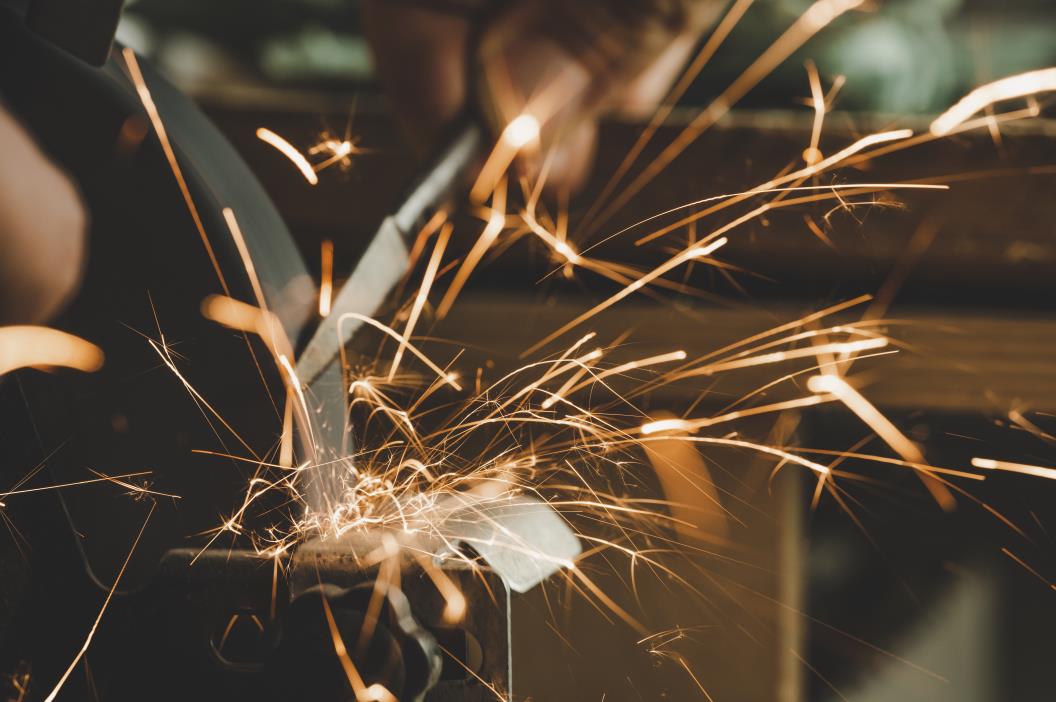
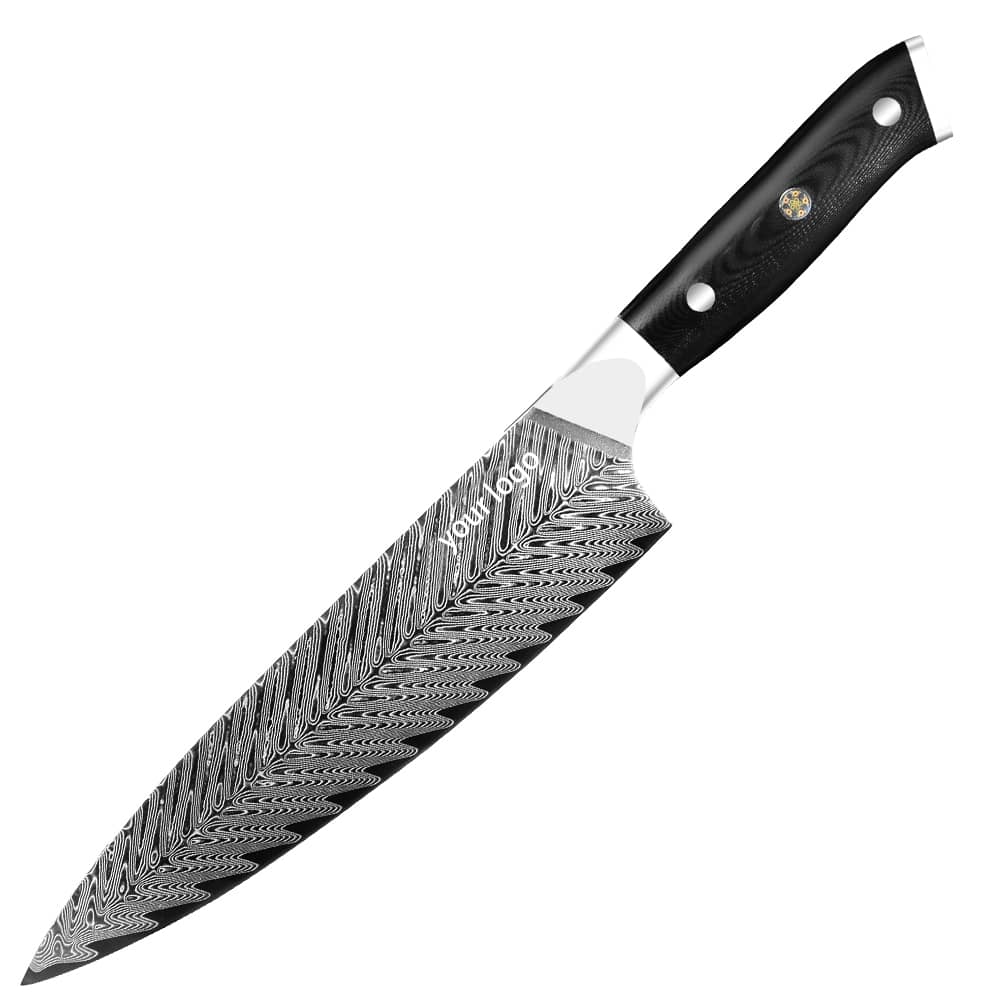
The Blade: Components & Geometry
The blade is where everything happens. Its geometry — tip shape, edge type, grind, and finish — determines what the knife can and cannot do.
For OEM buyers, blade geometry is one of the first specifications locked in during blade forging, and it directly affects tooling, grinding time, and unit cost.
Blade Tip & Point
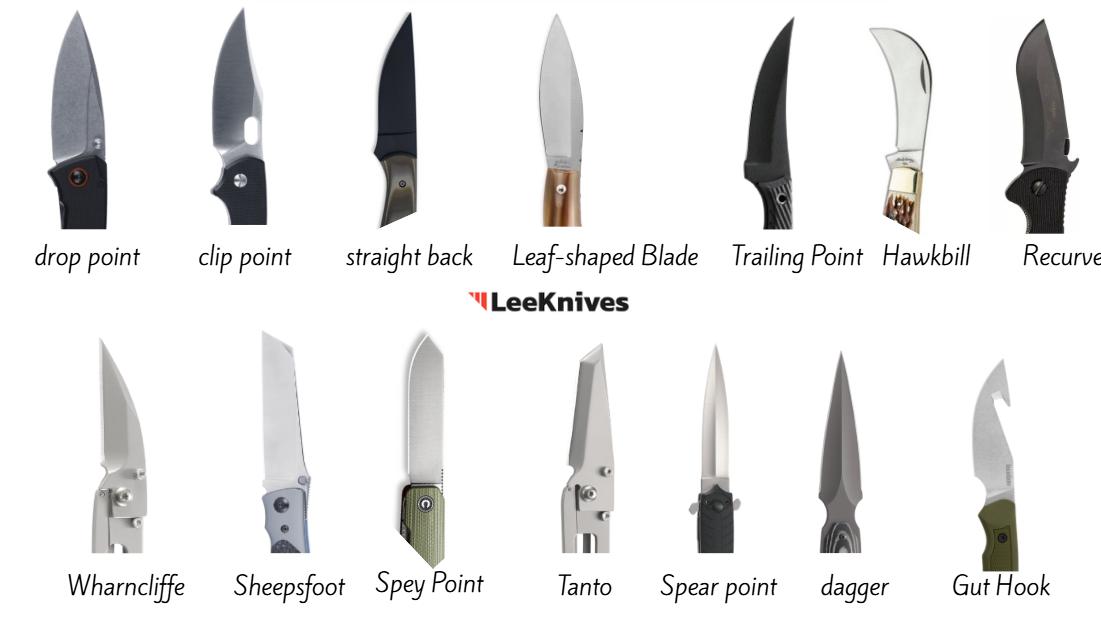
The point is where the spine and edge converge. The tip is the forward working section of the edge. Together, they define piercing ability, control, and safety. There are seven major blade tip shapes, each optimized for different tasks.
Common Blade Tip Shape Identification Table
| Tip Shape | Identifying Feature | Best For | Structural Risk |
|---|---|---|---|
| Drop Point | Spine curves gently down to a broad tip | General purpose, hunting, chef knives | Low — strong, forgiving |
| Clip Point | Concave “clip” cut on spine front | Fine piercing, detail work | High — thin tip prone to breaking |
| Spear Point | Tip centered on blade axis; symmetrical | Symmetrical piercing, daggers | Legal risk — classified as dagger in JP/AU |
| Tanto | Angular straight-line transition to tip | Tactical, prying, heavy piercing | Moderate — reinforced but thick |
| Sheepsfoot | Blunt, rounded tip; straight edge | Safety, rescue, Santoku-style | Very low — no piercing ability |
| Wharncliffe | Straight edge; spine curves steeply to tip | Pull cuts, precision, EDC | Low — strong tip |
| Hawkbill / Talon | Edge curves inward like a claw | Pulling, rope cutting, gardening | Moderate — specialized grind cost |
For more tip types and in-depth breakdowns of each blade style, explore our complete guide to knife blade shapes.
OEM Spec Note
Tip geometry is one of the first specifications locked in during blade forging. A tanto point requires 15–20% more stock removal than a drop point due to its angular transitions, increasing grinding time and cost. For entry-level kitchen knife lines, specify drop point or sheepsfoot — both offer low warranty risk and universal market acceptance.
Compliance & Risk Note
Spear point and dagger-style profiles are restricted or prohibited in Japan, Australia, and several EU jurisdictions. Before specifying spear-point blades for any OEM order, verify destination market knife laws. Clip point tips must carry a usage warning: the thin tip is not rated for prying or heavy-duty tasks.
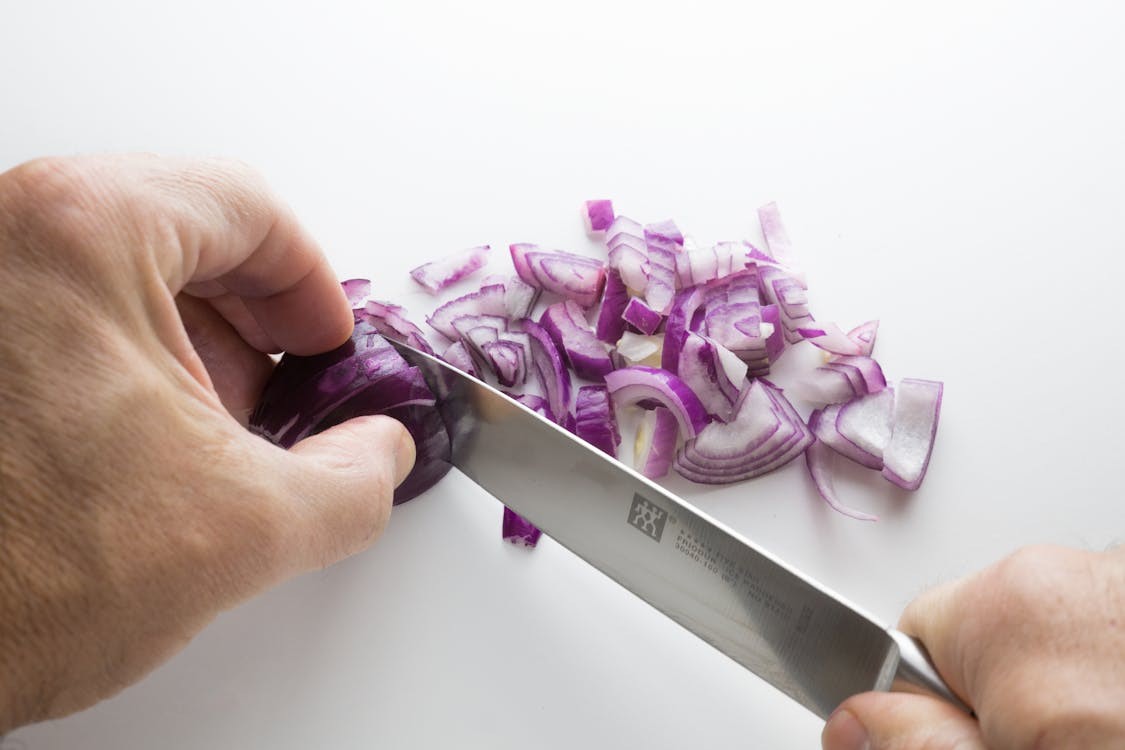
Cutting Edge
The edge is the sharpened portion of the blade that performs all cutting work. It extends from the tip to the heel. Edge geometry and sharpening angle determine how the knife “bites” into material. The edge is the only part of the knife that contacts the material being cut, making it the most critical wear surface and the primary driver of user satisfaction.
Belly
The belly is the curved section of the edge between the tip and the heel. It is the “working curve” of the blade — the part that rocks against the cutting board when you mince garlic or herbs. A pronounced belly is the signature feature of German-style chef knives; a flatter belly is characteristic of Japanese gyuto and nakiri knives.
How It Performs
The belly determines the knife’s cutting motion profile. A deep belly (German profile, ~2–3 inches of continuous curve) enables the rocking motion used for mincing and dicing. A flat belly (Japanese profile) favors push-cutting and slicing, where the blade moves straight down and back rather than in an arc.
How It Varies by Knife Type
| Knife Type | Belly Profile | Cutting Motion | OEM Consideration |
|---|---|---|---|
| German Chef’s Knife | Deep, continuous curve (2–3″) | Rocking chop | Higher grinding time; more steel removal |
| Japanese Gyuto | Gentle curve | Push-cut + light rock | Balanced profile; moderate grinding cost |
| Japanese Nakiri | Nearly flat | Pure push-cut | Lowest grinding cost; vegetable-optimized |
| Survival Knife | Minimal belly | Straight slicing | Maximizes edge length for batoning |
| Boning Knife | Moderate curve | Scooping + slicing | Flexibility takes priority over belly geometry |
OEM Spec Note
Belly curvature is defined by the belly radius (the imaginary circle the edge curve follows). German profiles use a belly radius of 80–120 mm; Japanese profiles use 150–250 mm. When specifying OEM kitchen knives for European buyers, target a belly radius of 90–110 mm — this matches the rocking-dominant cutting style preferred in most European commercial kitchens.
Cost & Margin Note
A deep belly profile requires 20–30% more grinding time than a flat profile on the same blank, because more steel must be removed to create the continuous curve. For high-volume OEM lines (>5,000 units), specify a moderate belly radius (100–130 mm) to balance cutting performance with line efficiency.
Spine / Back
The spine (or back) is the unsharpened top edge of the blade. It is the thickest part of the blade cross-section and provides the structural rigidity that prevents the blade from flexing or breaking under load. On kitchen knives, the spine is the surface your non-knife hand presses against when guiding the blade through dense materials.
How It Performs
Spine thickness is a direct proxy for blade strength. A thin spine (1.5–2.5 mm) reduces weight and drag, making the knife agile for fast prep work. A thick spine (4–6 mm+) enables batoning (splitting wood by striking the spine with another object) and prying — essential functions for survival and tactical knives.
How It Varies by Knife Type
| Knife Type | Spine Thickness | Primary Load | Structural Role |
|---|---|---|---|
| Japanese Chef’s Knife | 1.5–2.0 mm | Slicing, push-cutting | Minimal drag; precision-focused |
| Western Chef’s Knife | 2.0–2.5 mm | Rocking, chopping | Balanced strength and weight |
| Survival Knife | 4.0–6.0 mm+ | Batoning, prying | Maximum rigidity; impact absorption |
| Tactical Knife | 3.0–4.0 mm | Piercing, utility | Strength without excessive weight |
| Paring Knife | 1.5–2.0 mm | Precision peeling | Light, maneuverable |
OEM Spec Note
Specify spine thickness at three points: at the bolster (thickest), at mid-blade, and 10 mm from the tip. A distal taper (spine thinning from bolster to tip) is standard on high-end knives and improves balance, but it requires tighter forging tolerances (±0.15 mm vs ±0.25 mm for uniform spine).
Cost & Margin Note
Spine thickness directly impacts material cost and forging time. A survival knife spine at 5 mm requires 2–3× more stock steel than a kitchen knife spine at 2 mm, adding 15–20% to unit labor cost. However, specifying below 3 mm for survival knives triggers elevated return rates for “blade feels flimsy.”
Blade Face / Flat
The blade face (or flat) is the surface between the edge and the spine. It is the “canvas” of the blade — the area that carries the finish, the maker’s mark, and any decorative patterns. But the face is not just cosmetic: its geometry and texture directly affect how food behaves on the blade.
How It Performs
The blade face affects three performance characteristics:
- Food release: Concave grinds (hollow grind) or hammered textures (tsuchime) create air pockets that reduce vacuum adhesion, preventing sliced potatoes or meat from sticking to the blade.
- Aesthetics: The face carries the finish — satin, mirror, stonewash, or Damascus pattern — that customers see first and remember longest.
- Corrosion resistance: Polished faces resist rust better than rough finishes; coated faces (PVD/DLC) add a chemical barrier against moisture and acids.
OEM Spec Note
For kitchen knives destined for humid climates (Southeast Asia, coastal US), specify a minimum surface finish of 400-grit satin or apply a corrosion-resistant coating. Bare, unpolished steel faces show rust spots within 2–3 months in >70% humidity environments.
Risk Note
Damascus-pattern cladding with VG-10 core is the #1 requested OEM configuration from European buyers. The cladding adds 20–30% to material cost but commands a 50%+ retail premium. Ensure your supplier can consistently produce pattern uniformity across production runs — pattern variation is a top cosmetic rejection reason.
Heel
The heel is the rear portion of the blade edge, right where the blade meets the bolster or handle. On most kitchen knives, it is the tallest and thickest section of the edge, providing structural support for the entire blade. Think of it as the “power zone” of the knife — the part you instinctively press down on when cutting through a tough squash or separating a chicken joint.
2. How It Performs
The heel does two jobs that no other part of the blade can match. First, it delivers downward force — because it sits directly above the handle, your hand pressure transfers most efficiently through the heel into the cutting board. Second, it provides knuckle clearance: on an 8-inch chef’s knife, a properly sized heel stands 45–55 mm tall, keeping your knuckles safely above the board during fast chopping motions.
3. How It Varies by Knife Type
| Knife Type | Heel Height | Heel Thickness | Primary Role |
|---|---|---|---|
| Western Chef’s Knife (8″) | 45–55 mm | 2.5–3.5 mm | Knuckle clearance + rocking power |
| Japanese Gyuto | 35–45 mm | 2.0–3.0 mm | Lighter, push-cut optimized |
| Paring Knife (3–4″) | 15–20 mm | 1.5–2.0 mm | Precision control, minimal clearance needed |
| Boning Knife | 20–30 mm | 2.0–2.5 mm | Maneuverability around joints |
| Survival Knife | 30–40 mm | 4.0–6.0 mm | Batoning, prying, heavy-duty chopping |
| Bread Knife | 40–50 mm | 2.0–2.5 mm | Slicing clearance, minimal downward force |
OEM Spec Note
When specifying chef’s knives for European buyers, lock heel height at 45–50 mm for 8-inch blades. European grip styles (pinch grip) favor moderate clearance with balanced weight. For US buyers, 50–55 mm is preferred — the taller heel accommodates larger hand sizes and more aggressive rocking motions. Always specify heel height as a CTQ (Critical-to-Quality) dimension with ±1.5 mm tolerance; anything outside this range triggers elevated return rates for “handle feels wrong.”
Compliance & Risk Note
The heel is the #1 false-failure point in warranty claims. Customers often report “blade is bent” when the issue is actually a rolled heel edge caused by improper use (prying with the heel, cutting on glass boards). Pre-empt this by including a care card illustration showing correct heel use. For OEM buyers: clarify in your product manual whether heel sharpening is covered under warranty — many manufacturers exclude heel damage from standard coverage.
Ricasso, Choil & Plunge Line
Ricasso
The ricasso is the unsharpened, thick section of blade just above the bolster. On Japanese knives, this area is sometimes called 鎬 (shinogi-ji). The ricasso provides structural support at the blade-handle transition and acts as a visual boundary between the sharpened edge and the handle assembly. On high-end knives, the ricasso is polished to a higher finish than the blade face, creating a deliberate aesthetic contrast.
OEM Spec Note
Ricasso width (the distance from bolster to the start of the primary grind) should be 8–15 mm on chef’s knives. Too narrow, and the blade looks “inset” into the handle; too wide, and the knife loses effective edge length. Specify ricasso finish separately from blade face finish if you want the two-tone aesthetic common on premium Western knives.
Choil
The choil is a small unsharpened notch between the edge and the handle. A finger choil provides grip security for detailed work — your index finger hooks into the choil for controlled tip-down cuts. A sharpening choil creates a clear termination point for sharpening stones, preventing a recurve (a dip in the edge) from forming at the heel.
Risk Note
Finger choils on kitchen knives must be smooth and rounded (Ra < 0.8 μm). A sharp or rough choil edge is a laceration hazard and a common source of product liability claims. For OEM orders, specify choil edge break (chamfer or radius) as a safety-critical dimension.
Plunge Line
The plunge line is the vertical or angled line where the blade grind stops and the flat ricasso begins. A clean, crisp plunge line indicates quality grinding. Poor plunge lines — where the grind bleeds unevenly into the ricasso — create weak points and sharpening difficulties.
OEM Spec Note
Specify plunge line angle tolerance at ±2°. On full-flat-ground blades, the plunge line should be perpendicular to the edge; on saber grinds, it follows the grind shoulder. Inconsistent plunge lines are a top-5 cosmetic rejection reason in OEM QC.
Bolster
The bolster is the thick band of metal between the blade and the handle. It acts as a finger guard, adds forward weight for balance, and creates a smooth hygienic transition between blade and handle. On an 8-inch chef’s knife, the bolster typically adds 80–120 g of forward weight, creating a blade-heavy balance preferred for rocking cuts.
How It Varies by Knife Type
| Bolster Type | Description | Typical Use | Structural Note |
|---|---|---|---|
| Integral | Forged from the same steel as the blade | Premium kitchen knives | Maximum strength; highest forging cost |
| Full Bolster | Runs from spine to edge | Traditional German chef knives | Blocks heel sharpening; adds weight |
| Semi Bolster | Runs from handle to blade start | Modern kitchen knives | Compromise: protection + sharpenability |
| Distal / Tapered | Gradually tapers into blade | Lightweight designs | Minimal guard; aesthetic focus |
| None | No bolster; blade meets handle directly | Japanese wa-handles, EDC | Full edge sharpenability; lightest weight |
OEM Spec Note
Bolster design is a major cost driver. Integral bolsters require forging the blade and bolster as one piece, adding 25–35% to forging time versus a simple rat-tail or welded bolster. For mid-tier OEM lines ($40–$80 retail), semi bolsters offer the best balance of aesthetics, function, and cost. Specify bolster weight as a balance-critical parameter: target 80–100 g of forward weight for 8-inch chef knives.
Compliance & Risk Note
Almost all traditional Japanese kitchen knives omit the bolster entirely — allowing the entire edge to be sharpened and keeping the knife lighter. If your product line targets Japanese cuisine or professional sushi chefs, omitting the bolster is not a “cost cut”; it is a market-required feature. Conversely, if targeting European commercial kitchens, a bolster is expected as a hygiene and safety standard.
Read our detailed guide to knife bolsters for bolster manufacturing methods, weight distribution calculations, and market-by-market requirements.
Cutting Edge Types
The edge is where the blade meets the material. Four primary types exist, each with distinct cutting physics, maintenance profiles, and OEM cost implications.
| Edge Type | Visual ID | Best For | Maintenance | OEM Margin Impact |
|---|---|---|---|---|
| Plain Edge | Single continuous bevel | Clean cuts, push slicing, precision work | Easy to sharpen (whetstone) | Baseline |
| Serrated Edge | Saw-like teeth | Bread, rope, fibrous materials, tomatoes | Requires specialized sharpener or factory service | Lower (specialized tooling + service logistics) |
| Combo Edge | Plain near tip, serrated near heel | Versatility: detail + tough material | Complex: two sharpening systems | Lowest (dual-stage grinding + 8–15% unit cost increase) |
| Granton / Scalloped | Hollow air pockets along edge | Slicing meat, cheese, sticky foods | Same as plain edge | Slightly lower (additional grinding step for scallops) |
OEM Spec Note
For OEM kitchen knife lines targeting professional kitchens, plain edge is the default specification. It offers the lowest sharpening barrier for end users and the lowest warranty service cost for distributors. Combo edges are popular in the US EDC and tactical markets but almost never appear in professional culinary lines due to sharpening complexity.
Risk Note
Serrated edges generate the highest volume of user complaints related to maintenance. End users rarely own serrated sharpeners, and sending knives back for factory re-sharpening is cost-prohibitive for most brands. If specifying serrated edges, consider bundling a matching serrated sharpening rod with the product to reduce post-sale support burden.
Read more about Granton edge knives and plain edge vs serrated edge in our detailed comparison guides.
Bevel & Grind Basics
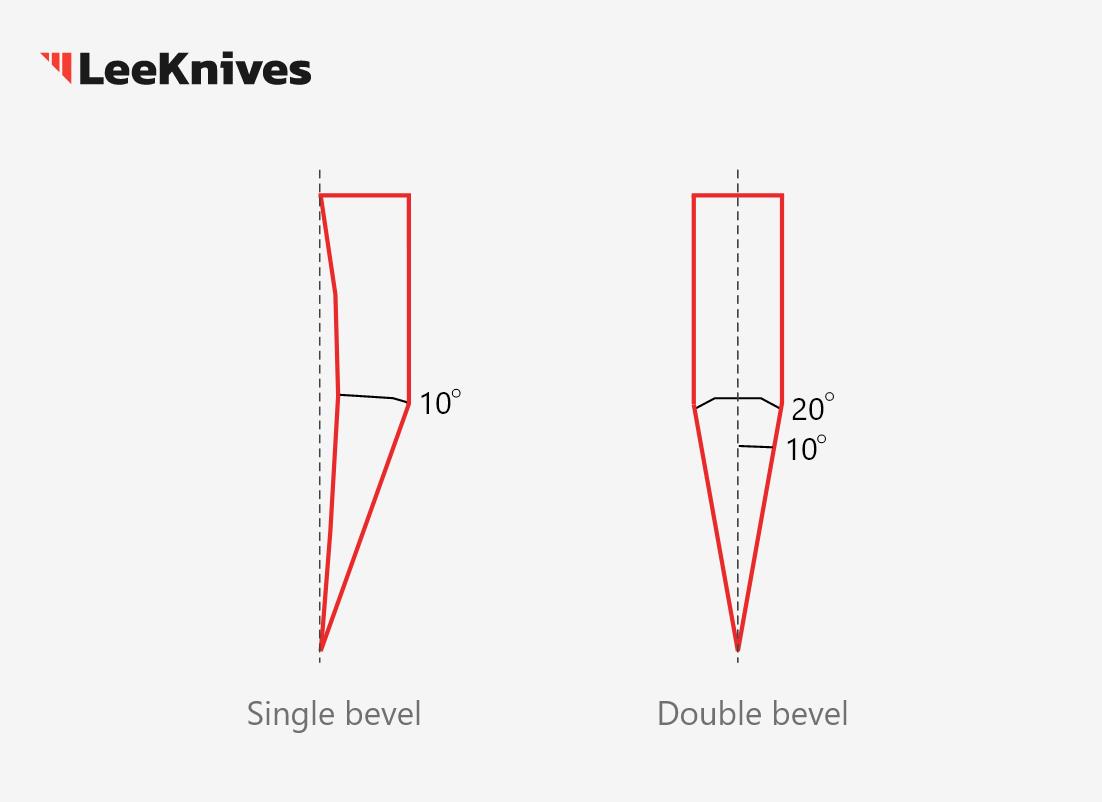
The bevel is the angled surface that forms the cutting edge. The grind is the overall cross-sectional shape of the blade. Together, they determine how the knife “bites” into material and how much steel supports the edge behind the cut.
Bevel Types
| Bevel Type | Structure | Common In | Key Characteristic |
|---|---|---|---|
| Double Bevel (V-Grind) | Ground on both sides; symmetric | Western kitchen knives, EDC | Ambidextrous; easiest to manufacture at scale |
| Single Bevel (Kataba) | Ground on one side only | Traditional Japanese knives (yanagiba, deba) | Asymmetric cut; requires handedness verification |
| Chisel Grind | Flat on one side, angled on other | Tactical tools, heavy-duty blades | Maximum edge strength; easiest to manufacture |
| Micro-bevel / Secondary | Thin secondary angle on primary edge | High-HRC blades (60+) | Prevents chipping; extends edge life |
OEM Spec Note
Double bevel is the global default for OEM kitchen knife orders. It is ambidextrous, has the lowest customer complaint rate, and runs efficiently on automated grinding lines. Single bevel must only be specified for traditional Japanese knife lines — and you must verify the customer’s handedness (left vs right) before production. A left-handed user cannot effectively use a right-handed single-bevel knife, and vice versa.
Compliance & Risk Note
Single bevel knives generate 3× higher return rates than double bevel when sold to general-market consumers who do not understand handedness requirements. If selling single-bevel knives through general retail (not specialty Japanese cuisine channels), include prominent handedness labeling and a “not ambidextrous” warning.
Grind Types
The grind is the blade’s cross-sectional silhouette — how the steel is shaped from spine to edge. Each grind creates a different cutting feel, edge strength, and manufacturing cost profile.
| Grind Type | Cross-Section Shape | Cutting Feel | OEM Cost Tier | Best For |
|---|---|---|---|---|
| Flat Grind (V-Grind) | Linear taper from spine to edge | Clean, predictable slicing; moderate edge strength | Low | Universal standard; kitchen knives, EDC |
| Hollow Grind | Concave curve; thin behind the edge | Extremely sharp initial bite; low cutting resistance | Medium | Razors, hunting knives, precision EDC |
| Convex Grind (Hamaguri) | Convex curve like a clam shell | Strong edge + smooth food release; “sticky” feel | High | High-end Japanese chef knives, premium outdoor |
| Scandi Grind | Flat face with abrupt edge angle; no secondary bevel | Aggressive bite; easy to sharpen in the field | Medium | Bushcraft, survival knives (Mora-style) |
| Saber / High Flat | Flat grind starting at mid-blade; thick upper spine | Stronger than full flat; heavier cutting feel | Low | Tactical knives, heavy-duty outdoor |
| Compound Grind | Multiple grind types on different blade sections | Custom performance per blade zone | Very High | Tactical, high-end custom, CNC showcase |
OEM Spec Note
Flat grind is the global workhorse for OEM kitchen knife production. It runs efficiently on automated belt systems, holds tight tolerances (±0.05 mm), and offers the lowest unit cost for volume. Saber and high-flat grinds are specified when blade strength is critical — the thick upper spine resists lateral flex during heavy chopping.
Compliance & Risk Note
Hollow grind blades have thinner steel behind the edge, making them more prone to chipping when used on hard materials (bone, frozen food, wood). If specifying hollow grind for kitchen knives, include a usage advisory: “Designed for slicing proteins and vegetables; not recommended for cutting through bone or frozen foods.” This pre-empts the #1 misuse-related warranty claim for hollow-ground blades.
For a complete breakdown of grind geometry, performance curves, and manufacturing feasibility, read our blade grind guide.
Blade Surface Finishes

Surface finish is the knife’s first impression — the visual and tactile signature that customers see before they ever make a cut. But for manufacturers, finish is far more than aesthetics.
It determines corrosion resistance, food-release behavior, manufacturing yield, and warranty return rates. For a complete breakdown of all blade finish types — including satin, stonewash, DLC, PVD, and more — see our Knife Blade Finishes Guide.
The Six Finish Families
| Finish Family | Visual Description | Core Function | OEM Cost Tier | Warranty Risk |
|---|---|---|---|---|
| Brushed / Satin | Fine, directional scratch pattern; matte sheen | Hides scratches; low-cost, high-volume standard | Low | Very Low |
| Polished / Mirror | Reflective, mirror-like surface | Premium aesthetic; easy cleaning | Very High | High (scratch visibility) |
| Stonewash / Matte | Random, textured micro-scratches; muted luster | Hides wear; hard-use aesthetic | Medium | Very Low |
| Forged / Hammered | Visible hammer marks or retained forge scale | Artisan aesthetic; food release (tsuchime) | High | Low (scale adhesion) |
| Coated (PVD/DLC/PTFE) | Uniform color layer (black, grey, bronze) | Corrosion/wear protection; tactical aesthetic | Medium–High | Medium (delamination) |
| Chemical (Acid/Passivation/Bluing) | Invisible or near-invisible surface modification | Corrosion resistance; food-safety compliance | Low–Medium | Low |
OEM Spec Note
For stainless kitchen knives exported to the EU or USA, verify that the factory performs passivation (acid treatment to remove surface free iron and form a chrome-oxide barrier). Many buyers now require passivation certificates for food-safety compliance. If your finish specification includes PVD or DLC coating, mandate cross-hatch adhesion testing (ASTM D3359) and wear testing (ASTM D4060) in your PO — coating delamination is a top-3 warranty complaint for coated outdoor knives.
Compliance & Risk Note
PTFE (Teflon-style) coatings on kitchen knives require food-grade certification (FDA 21 CFR 175.300 / EU 10/2011) and strict adhesion testing. A PTFE flake in food is a liability nightmare. If specifying PTFE for cheese knives or slicing knives, require the factory to provide coating composition certificates and migration test reports.
The Tang: Handle Core Structure
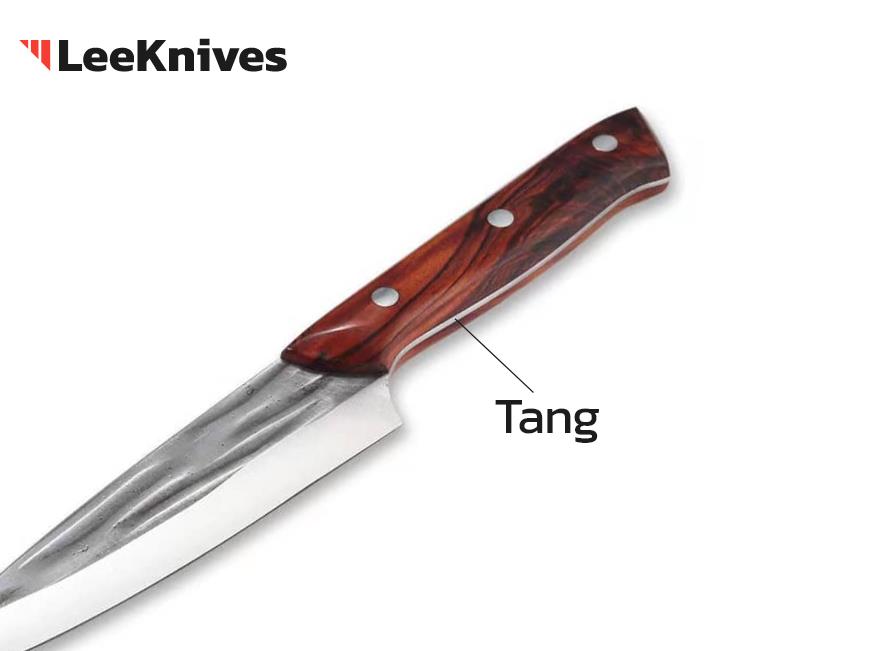
What Is the Tang?
The tang is the unsharpened extension of the blade steel that continues into the handle. It is the structural backbone of the knife: without it, the blade is merely a piece of sharp metal held in place by glue or friction. In engineering terms, the tang is the load-transfer member that carries cutting forces from the blade into the handle and ultimately into the user’s hand.
The tang determines three things that matter to every buyer and manufacturer:
- Strength: A full tang prevents the blade from separating from the handle under torsional or impact stress. A weak or short tang is the most common failure point in low-quality knives — and the most expensive failure to warranty.
- Balance: The tang’s length, thickness, and taper dictate where the knife’s center of mass sits. A tapered tang shifts balance toward the index finger for superior handling; a thick, untapered tang creates a handle-heavy feel.
- Cost: Tang type is often the single biggest driver of manufacturing cost after the blade steel itself. Specifying the wrong tang for the application either wastes margin or creates liability.
Primary Knife Tang Structure Types
| Tang Type | Description | Strength | Weight | Typical Use | OEM Cost Impact |
|---|---|---|---|---|---|
| Full Tang | Extends full length and width of handle | Maximum | Heaviest | Chef knives, survival knives | Baseline |
| Partial / Half Tang | Extends partway (1/2 to 2/3) | Moderate | Lighter | Budget kitchen knives, decorative | –15–25% vs full |
| Hidden Tang | Fully concealed; often rat-tail profile | Moderate | Varies | Traditional Japanese, custom | Similar to partial |
| Through Tang | Hidden tang protruding through butt | Near-full | Moderate | High-end German, survival | +10–15% vs hidden |
Each tang type pairs with different handle assembly methods. Full-tang knives are usually riveted or bolted; hidden-tang knives often use adhesive bonding or hybrid fixation.
Full Tang Variants
Not all full tang knives are equal. The sub-type affects balance, cost, and aesthetics:
| Variant | Identifying Feature | OEM Positioning | Cost Note |
|---|---|---|---|
| Standard Full Tang | Tang profile matches handle scales exactly; flush sides | Most common OEM form | Baseline |
| Exposed Full Tang | Tang edges protrude slightly beyond scales | Tactical, “muscle” aesthetic | +5–10% (higher machining precision) |
| Tapered Full Tang | Tang thickness decreases from blade to butt | High-end, $200+ custom | +25–40% (forging + grinding time) |
| Skeletonized Full Tang | Material removed via CNC or wire EDM | EDC, tactical, ultralight | +40–60% (precision machining) |
| Overmolded Full Tang | Rubber/plastic injected directly over tang | Butcher, rescue, marine | +$2,000–5,000 mold investment; lowest per-unit at scale |
OEM Spec Note
Full tang is non-negotiable for survival knives due to liability and safety standards (EN ISO 8442 for cutlery, ASTM F1804 for hunting knives). For kitchen knives, partial tang is acceptable for paring knives under 5 inches, but chef’s knives 8+ inches should specify full tang for commercial durability. When specifying full tang, always state tang thickness at bolster and tang thickness at butt separately — a tapered tang (3.0 mm → 1.5 mm) commands premium positioning but requires tighter forging tolerances (±0.2 mm).
Compliance & Risk Note
Hidden tang knives are entirely dependent on adhesive bond quality. If specifying hidden tang for Japanese-style lines, require the factory to use epoxy rated for thermal cycling (–20°C to +80°C) and mandate torque testing on sampled units. A hidden tang failure is catastrophic (blade separation) and typically results in a full product recall rather than an individual warranty claim.
Read our guide to rat tail tang vs full tang for detailed tang engineering data, assembly method cost models, and OEM contract specification templates.
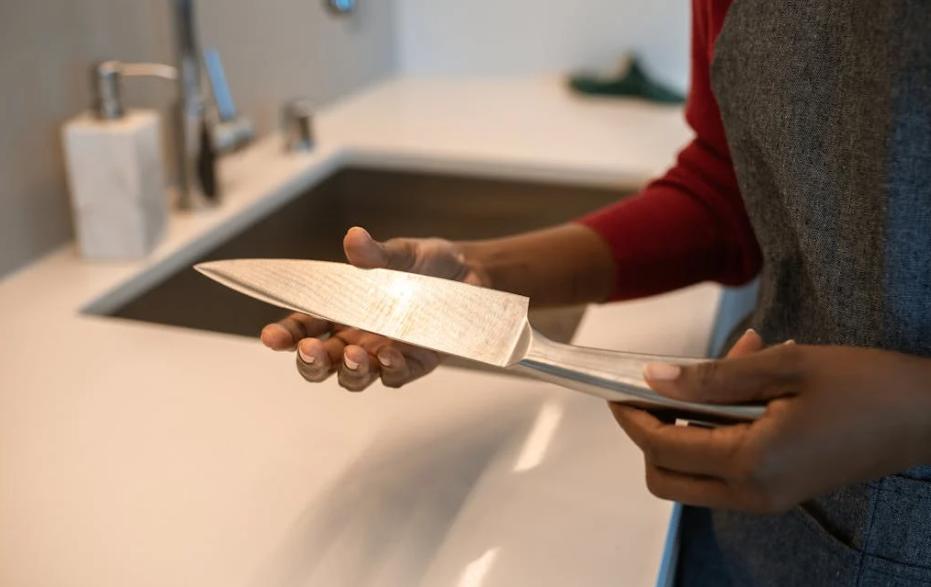
The Handle
The handle is your point of contact. It must balance comfort, grip security, hygiene, and cost. In any knife structure, handle design determines how long a user can work without fatigue and how safely the knife performs under wet or stressful conditions.
Handle Components
| Component | Description | Function |
|---|---|---|
| Scales / Handle Panels | The two pieces of material attached to the tang | Grip surface, aesthetics, ergonomics |
| Rivets / Pins / Screws | Fasteners through scales and tang | Secure assembly; serviceability |
| Lanyard Hole | Hole drilled through butt or tang | Cord attachment; drop prevention |
| Butt / Pommel | Terminal end of the handle | Counterbalance, striking surface |
Handle Materials (Overview)
Common handle materials include wood (rosewood, olive, ebony), synthetic composites (G10, Micarta, carbon fiber), injection-molded plastics (FRN, POM, TPE), and metals (stainless steel, titanium). Each offers different trade-offs in grip, durability, weight, and cost.
Read our knife handle materials guide, knife handle designs, and knife handle construction guide for a structural breakdown of scales, tang types, and coverage.
OEM Spec Note
Handle material choice is often the biggest cost driver after blade steel. Injection-molded FRN handles cost 60–80% less than hand-finished wood scales. Switching from G10 scales to Micarta can shift the balance point 8–12 mm rearward without changing the blade. When specifying handle materials, always request grip coefficient test data (wet and dry) — a slippery handle when wet is a leading cause of kitchen laceration injuries.
Western vs Japanese Handle Design
| Feature | Western Handle | Japanese Wa-Handle |
|---|---|---|
| Shape | Contoured, ergonomic | Straight, cylindrical or octagonal |
| Material | POM, wood, composite | Wood (magnolia, walnut, ebony) |
| Tang visibility | Hidden inside handle | Often visible at butt (full tang) |
| Weight distribution | Handle-heavy or balanced | More neutral to blade-forward |
| Replacement | Difficult (riveted) | Easier (slips off tang) |
| Feel | Familiar to Western users | Lighter, requires adaptation |
OEM Spec Note
Wa-handles are not interchangeable with Western handles on the same tang geometry. A knife designed for wa-handle assembly has a narrower, longer tang profile than one designed for Western scales. If your product line includes both styles, you need separate blade forgings — attempting to fit wa-handles onto Western tangs results in loose fit and safety liability.
Handle End (Butt / Pommel)
The butt or pommel is the handle’s terminal end. Features to consider:
- Lanyard hole: Essential for outdoor and marine knives. Adds machining cost (~$0.10–$0.20/unit).
- Glass breaker / striking pommel: Tactical feature. Requires hardened steel insert or exposed tang end.
- Exposed tang end: On full-tang knives, the tang may protrude as a striking surface or design element.
Read more about Japanese knife handles and wa handles in our dedicated guides.
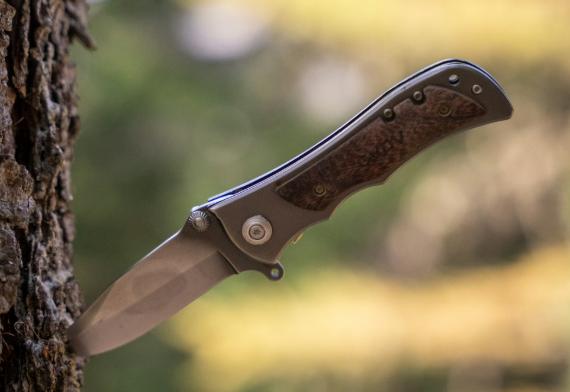
Fixed Blade vs Folding Knife Structure
All knives fall into two fundamental construction categories. The choice between them is not just about portability — it is about structural philosophy.
| Feature | Fixed Blade | Folding Knife |
|---|---|---|
| Strength | Maximum (no moving parts) | Limited by pivot and lock |
| Weight | Heavier | Lighter (when closed) |
| Maintenance | Simple (clean and dry) | Complex (pivot lubrication, spring wear) |
| Speed | Always ready | Requires deployment |
| Safety | Needs sheath | Lock prevents accidental closure |
| Cost to manufacture | Lower per unit | Higher (precision pivot machining) |
| Best for | Kitchen, outdoor, tactical | EDC, pocket carry, backup |
OEM Spec Note
Fixed blades are cheaper to manufacture per unit but have higher shipping costs due to size (must ship with sheath, classified as sharp object). Folding knives require precision machining for pivots and locks, adding $5–$15 to unit cost depending on mechanism complexity. If your distribution channel is online direct-to-consumer, fixed blades have lower landed cost; if retail shelf space is limited, folding knives offer higher SKU density.
Compliance & Risk Note
Folding knives introduce mechanical liability. The lock is the critical safety component — a failed lock can result in blade closure on fingers. If specifying folding knives for OEM, mandate lock fatigue testing (typically 5,000+ open/close cycles) and lock force testing (blade must not close under X N of spine pressure). Lock failure is the #1 liability claim for folding knife manufacturers.
Read our fixed blade vs folding knife comparison for a deeper analysis of use-case matching, legal considerations, and manufacturing trade-offs.
Chef Knife vs Pocket Knife Anatomy
While all knives share fundamental anatomy, kitchen knives and pocket knives optimize for completely different tasks. Understanding these structural differences is essential for buyers, manufacturers, and anyone specifying knives for a particular application.
Chef Knife Anatomy
A chef’s knife is optimized for repetitive cutting on a board.
| Feature | Chef Knife Characteristic | Why It Matters |
|---|---|---|
| Belly | Pronounced curve (2–3 inches) | Enables rocking motion for mincing |
| Heel | Tall (45–55 mm) | Knuckle clearance above cutting board |
| Bolster | Usually present | Balance, finger protection |
| Edge | Thin, acute angle (15–20°) | Clean slicing through food |
| Spine | Thin (1.5–2.5 mm) | Reduces weight and drag |
| Tang | Full tang standard | Durability for commercial use |
| Handle | Riveted, hygienic materials | Easy to clean, secure grip when wet |
| Weight | 180–280 g | Heavy enough for momentum, light enough for control |
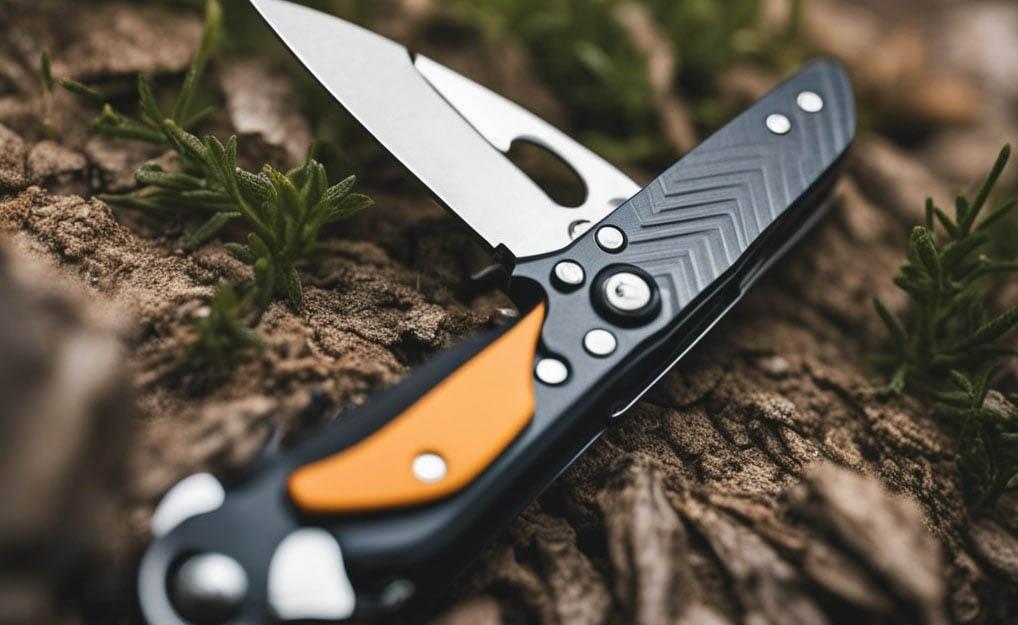
Pocket Knife Anatomy
A pocket knife adds mechanical complexity for portability.
| Feature | Pocket Knife Characteristic | Why It Matters |
|---|---|---|
| Pivot | Central axle with bearings or washers | Smooth opening, blade stability |
| Lock | Liner, frame, back, or axis lock | Prevents blade from closing on fingers |
| Opening Device | Thumb stud, thumb hole, flipper tab, nail nick | One-hand deployment |
| Clip | Pocket wire or deep-carry clip | Secure carry, quick access |
| Spacer / Standoff | Maintains handle structure when open | Rigidity without excess weight |
| Blade | Varies by design; often no bolster | Compact, multi-purpose |
| Handle | Textured for grip; often includes frame as handle | Durability, aesthetics |
| Weight | 80–180 g | Light enough for daily pocket carry |
Side-by-Side Comparison
| Component | Chef Knife | Pocket Knife |
|---|---|---|
| Primary goal | Slicing efficiency | Portability + versatility |
| Blade profile | Curved belly, thin spine | Variable; often straight or clip-point |
| Bolster | Usually yes | No |
| Tang | Full tang (fixed) | N/A (folding) |
| Mechanism | None | Pivot + lock essential |
| Handle priority | Hygiene, comfort | Grip security, pocketability |
Read our kitchen knife parts guide, and pocket knife anatomy guide for category-specific deep dives.
Opening & Locking Mechanisms
For folding knives, the mechanism is as critical as the blade itself. The Structure Pillar covers identification only; mechanism physics, legality, and manufacturing are covered in our dedicated guides.
Opening Mechanisms
| Type | Identifying Feature | Legality | Best For |
|---|---|---|---|
| Manual Opening | Nail nick, thumb stud, thumb hole, flipper | Legal everywhere | General EDC, traditional knives |
| Assisted Opening | Spring helps deployment once started | Restricted in some regions | Faster EDC deployment |
| Automatic / Switchblade | Button-activated spring deployment | Heavily restricted | Military, law enforcement (where legal) |
Compliance Note
OEM buyers must verify destination market laws before producing automatic or assisted-opening knives. Automatic knives are banned or restricted in 15+ US states and most EU countries. Assisted opening occupies a legal gray zone in Canada, Australia, and the UK — consult local customs classification before shipping.
Locking Mechanisms
| Type | How It Works | Strength | Common In |
|---|---|---|---|
| Liner Lock | Spring steel liner wedges behind blade | Moderate | Budget to mid-range folders |
| Frame Lock | Handle frame itself locks the blade | Strong | Titanium EDC knives |
| Back Lock | Spine-mounted lock bar | Strong, ambidextrous | Traditional folders |
| Axis / Crossbar Lock | Bar slides through handle | Very strong | Benchmade and clones |
| Compression Lock | Modified liner lock on spine side | Very strong | Spyderco Paramilitary series |
Compliance & Risk Note
In the UK and many EU jurisdictions, a knife that locks open is classified more restrictively than a non-locking (slip-joint) knife. If you sell into these markets, offering a UK-legal slip-joint line can open significant market access. The material of the lock interface (steel lock face vs titanium lock face) determines long-term wear — specify lock-face insert materials in your OEM requirements.
Read our knife opening mechanisms guide and knife lock types guide for detailed mechanism breakdowns, legality maps, and manufacturing specifications.
Knife Anatomy FAQ
What is the difference between a bevel and a grind?
The bevel is the angled surface that forms the cutting edge. The grind is the overall shape of the blade’s cross-section (flat, hollow, convex, etc.). Think of the bevel as the “edge’s angle” and the grind as the “blade’s silhouette.”
What is the blade core?
The blade core is the hard steel center in clad or laminated blades. It is surrounded by softer steel cladding for protection and stain resistance. This construction allows knifemakers to combine the best properties of different steels. Read more about San Mai clad steel.
What makes a balanced knife?
A balanced knife rests level when placed on a finger at the balance point. Blade-heavy knives rock better for chopping. Handle-heavy knives offer more control for precision. Balance is determined by tang length, bolster weight, handle material density, and distal taper.
OEM Spec Note
Balance can be adjusted without changing blade profile. For OEM buyers, specifying target balance point (in millimeters from bolster) ensures consistent feel across production runs. Target +5 to +15 mm forward of bolster for chef’s knives; 0 to –5 mm for paring knives.
What is the best knife structure for professional kitchens?
Professional kitchens typically use full tang chef knives with a pronounced belly, 45–50 mm heel height, double bevel (15–20° per side), and hygienic handle materials (POM, FRN, or sealed wood). Bolsters are optional but common in Western-style lines. Japanese professional kitchens prefer wa-handles with no bolster and flatter belly profiles.
How does knife construction affect price?
The biggest cost drivers are: (1) blade steel grade, (2) tang type and handle assembly method, (3) surface finish, and (4) mechanism complexity (for folders). A stamped blade with injection-molded handle can cost 60–80% less than a forged full-tang knife with hand-finished scales.
| Cost Tier | Typical Construction | Retail Range |
|---|---|---|
| Entry | Stamped blade, partial tang, injection-molded handle | $15–$35 |
| Mid-tier | Forged blade, full tang, riveted scales, satin finish | $40–$80 |
| Premium | Forged blade, tapered full tang, premium materials, mirror/Damascus | $120–$300+ |
Which tang type is best for OEM kitchen knives?
Short answer: Full tang for chef’s knives 8 inches and above; partial tang is acceptable only for paring knives under 5 inches.
Why: Full tang provides the structural integrity required for commercial kitchen environments, where knives see 500–1,000 cutting cycles per day. Partial tang fails at the handle junction under sustained torsional load. The cost difference ($1.20–$1.80/unit for riveted full tang vs. overmolded partial) is recovered through reduced warranty claims and higher retail price positioning.
For premium lines: Consider tapered full tang (3.0 mm at bolster → 1.5 mm at butt). It shifts the balance point forward by 8–12 mm, creating superior pinch-grip handling. This feature commands a $15–$30 retail premium and is standard on knives retailing above $120.
What surface finish should I specify for a high-volume OEM kitchen knife order?
For home cooks: Look for a brushed or satin finish — it’s the “workhorse” finish that hides scratches from daily use while looking professional. Avoid mirror polish unless you enjoy polishing out fingerprints every time you cook.
For buyers: Straight satin finish (400–600 grit) is the cost-optimal default for kitchen knife OEM. It offers the best balance of aesthetic acceptance, corrosion resistance, and manufacturing yield (>95% first-pass). Specify passivation treatment as a mandatory post-process for all stainless blades destined for EU/USA — without it, you risk customs rejection or retailer compliance audits.
Cost benchmark (per unit, 8″ chef knife, 1,000+ MOQ):
- Straight satin: Baseline
- Fine satin (800 grit): +$0.30–$0.50
- Stonewash: +$0.50–$0.80
- Mirror polish: +$2.00–$4.00 (including 15–25% scrap allowance)
- PVD coating: +$3.00–$8.00
What is the hole in a knife blade called?
The hole in a folding knife blade is called a thumb hole or Spyder hole. It lets you open the blade one-handed by pressing the hole with your thumb. It is common on EDC pocket knives and is a legal alternative to spring-assisted or automatic opening mechanisms in many regions.
OEM Risk Note
Round thumb holes are associated with Spyderco’s brand identity. If specifying thumb holes for OEM pocket knives, consider oval or teardrop shapes to avoid potential trademark disputes, or obtain legal clearance for round-hole designs.
What are the ridges on top of a knife called?
The ridges on the spine of a blade are called jimping. They add texture so your thumb or index finger can grip the spine securely during detailed cuts. Jimping is common on tactical, outdoor, and some EDC knives.
From Spec Sheet to Shelf: Build Your Knife Line with LeeKnives
Understanding knife anatomy is the first step in specifying a product your customers will love. The next step is finding a manufacturer that can turn those specifications into reality — on budget, on time, and at scale.
LeeKnives is a Yangjiang-based knife OEM and wholesale manufacturer with 30+ years of production experience. We serve importers, private-label brands, and retailers across the US, Europe, and Asia-Pacific with:
- Full-range OEM/ODM — Kitchen knives, outdoor knives, folding/EDC knives across entry, mid, and premium tiers
- Private label & custom packaging — Logo laser engraving, retail-ready packaging, custom handle materials
- Low MOQ with fast turnaround — Accessible minimums with standard 30-day lead times
- Dual warehousing — Ship from China or our US fulfillment center for faster domestic delivery
- Quality compliance — FDA, LFGB, ISO, and BSCI certifications available per market requirement
Whether you are launching a new knife brand, expanding your product line, or replacing an underperforming supplier, we control the entire manufacturing process so you can focus on growth.